
HDMI Replacement Tips: Expert Methods Inside
Whether you’re a dedicated console gamer, a PC enthusiast, or someone who relies on gaming displays for streaming and content creation, a faulty HDMI cable or port can completely derail your gaming experience. At TTOPZ Video Game Repairs & HDMI Replacement, we’ve helped thousands of gamers restore their systems to peak performance. This comprehensive guide walks you through everything you need to know about HDMI replacement, troubleshooting, and professional repair methods that’ll get you back in the game faster than you can say “Game Over.”
HDMI (High-Definition Multimedia Interface) cables are the lifeline connecting your gaming console, PC, or streaming device to your display. When they fail, you lose video signal, audio, or both. The frustration is real—especially when you’re in the middle of an intense gaming session or trying to enjoy your favorite titles. But don’t panic. With the right knowledge and approach, HDMI issues are highly manageable, and in many cases, easily preventable.
This guide explores expert-approved methods for diagnosing HDMI problems, replacing cables safely, and maintaining your connections for long-term reliability. We’ll cover everything from quick DIY fixes to when you absolutely need professional help from experienced technicians who specialize in video game repairs.
Understanding HDMI Cable Failures
HDMI cables are surprisingly durable, but they’re not indestructible. Understanding why they fail helps you prevent future problems and recognize issues early. The most common culprits behind HDMI failures include physical damage, electromagnetic interference, manufacturing defects, and wear from repeated connecting and disconnecting.
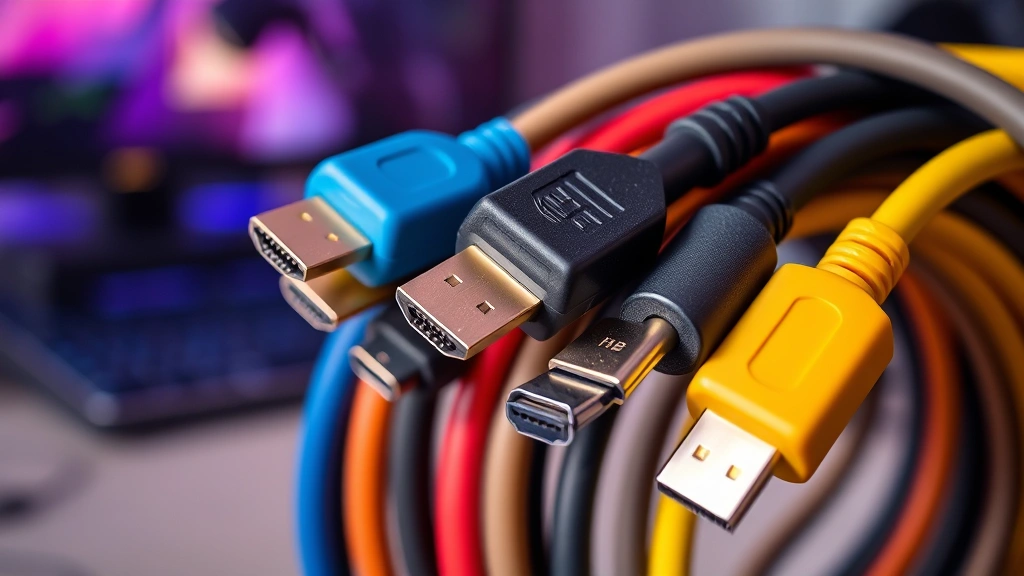
The internal structure of an HDMI cable contains 19 pins that transmit video, audio, and control signals simultaneously. When even one pin becomes corroded, bent, or damaged, signal loss occurs. High-quality cables feature better shielding and connector construction, which is why investing in certified cables matters. If you’re building or upgrading your setup, check out our Gaming PC Build Guide for comprehensive hardware recommendations.
Moisture and temperature fluctuations accelerate connector corrosion. Gaming setups that run hot—especially high-performance PCs with powerful graphics cards—create environments where HDMI connectors degrade faster. Additionally, pulling cables at sharp angles instead of straight out puts stress on internal connections, leading to intermittent failures that frustrate gamers trying to troubleshoot.
According to IGN’s hardware testing lab, approximately 15-20% of HDMI cable failures occur within the first two years of use, primarily due to user mishandling rather than manufacturing defects. This statistic emphasizes why proper installation and maintenance techniques are critical for longevity.
Signs Your HDMI Cable Needs Replacement
Recognizing early warning signs prevents total connection failure during crucial gaming moments. Here are the telltale indicators that your HDMI cable is approaching end-of-life or already compromised:
- Intermittent video signal loss: Screen goes black momentarily, then returns. This suggests internal pin contact issues.
- Flickering or pixelated display: Random visual artifacts or screen flicker indicates signal degradation.
- No audio or distorted sound: Audio pins fail before video pins sometimes, causing sound-only problems.
- Partial image display: Only portions of your screen show video while other areas remain blank.
- Color distortion: Unusual color shifts, washing, or loss of color channels suggest pin failure.
- Bent or corroded connectors: Visible physical damage to the metal connector ends means replacement is necessary.
- Loose connection feeling: Cable pulls out too easily or feels wobbly when inserted.
If you experience any of these issues, troubleshooting before replacement is wise. However, visible physical damage warrants immediate replacement. Don’t attempt to game through a failing cable—the frustration isn’t worth it, and you risk damaging your gaming device’s HDMI port through repeated connection attempts.

Choosing the Right Replacement Cable
Not all HDMI cables are created equal, despite what budget retailers might suggest. Understanding cable specifications ensures you purchase the correct replacement that matches your gaming needs and device capabilities.
HDMI Version Matters: HDMI 2.0 cables support 4K resolution at 60Hz, making them ideal for modern gaming consoles like PlayStation 5 and Xbox Series X. HDMI 2.1 cables handle 8K resolution and variable refresh rates (VRR), essential for high-end PC gaming setups. If you’re unsure about your display capabilities, check your monitor or TV specifications before purchasing replacement cables.
Cable Length Considerations: Longer cables aren’t inherently worse, but excessive length introduces potential for signal degradation over distance. For gaming setups, keep cables under 25 feet when possible. If you need longer runs, consider active cables with built-in signal amplification. When recording gameplay on PC, ensure your cables support the bandwidth your setup requires.
Certification and Shielding: Look for cables labeled as “HDMI Licensed” or “HDMI Certified.” These meet official specifications and undergo rigorous testing. Premium shielding protects against electromagnetic interference, which is crucial in setups with multiple electronic devices. Budget cables often skimp on shielding, leading to shorter lifespans.
Connector Type: Standard HDMI connectors fit most devices. However, some compact gaming devices use Mini-HDMI or Micro-HDMI ports. Verify your device’s connector type before purchasing—using adapters for wrong connector types adds potential failure points.
According to GameSpot’s equipment reviews, mid-range certified cables (typically $15-25) offer the best value for gaming purposes. Premium cables above $50 provide marginal improvements unless you have specific professional requirements like 8K gaming or commercial installation needs.
Step-by-Step HDMI Cable Replacement Guide
Replacing an HDMI cable is straightforward when you follow proper procedure. This DIY approach works for cable-only replacements; if your device’s HDMI port is damaged, skip to the professional repair section.
What You’ll Need:
- New certified HDMI cable (correct version and connector type)
- Soft cloth (optional, for cleaning connectors)
- Flashlight (to inspect ports clearly)
- Your gaming device and display
The Replacement Process:
- Power down completely: Turn off your gaming device and display. This prevents potential electrical damage and protects your equipment.
- Wait 30 seconds: Allow residual power to dissipate from capacitors in your devices.
- Disconnect the old cable: Gently pull the HDMI cable straight out from both the device and display. Never yank at angles—this damages internal pins.
- Inspect the ports: Use your flashlight to examine both HDMI ports for bent pins, corrosion, or debris. If you see damage to the port itself (not just the cable), professional repair is necessary.
- Clean the ports if needed: Use a soft, dry cloth to gently wipe the connector ends. Never use liquids or compressed air in ports.
- Insert the new cable: Align the cable connector with the port and push straight in until you feel resistance. It should seat firmly without excessive force.
- Verify connection: Ensure the cable is fully inserted—partially seated cables cause intermittent failures.
- Power on your devices: Turn on your display first, then your gaming device. This establishes proper handshake between devices.
- Test video and audio: Confirm both video and audio work correctly before returning to gaming.
If the new cable doesn’t resolve your issues, the problem likely lies with the HDMI port itself, requiring professional intervention. This is also a good time to explore whether cloud gaming services might supplement your gaming options while repairs are underway.
Professional HDMI Port Repair Methods
When the HDMI port itself is damaged, professional repair becomes necessary. TTOPZ Video Game Repairs specializes in advanced port restoration techniques that save expensive devices from replacement.
Port Cleaning and Restoration: Professional technicians use specialized tools and microscopes to inspect ports at 40x magnification. Often, what appears to be port damage is actually corrosion or debris that professional cleaning resolves. Ultrasonic cleaning equipment removes microscopic corrosion without damaging delicate pin structures.
Pin Realignment: Bent pins inside HDMI ports can sometimes be carefully realigned by experienced technicians using precision tools. This non-invasive approach restores functionality without replacing the entire port assembly. Success rates exceed 85% when pins aren’t completely broken.
Port Replacement: When ports are severely damaged, complete replacement becomes necessary. Technicians desolder the damaged port and install a new one using specialized soldering equipment. This requires micro-soldering expertise, as HDMI ports contain dozens of tiny connections. Modern gaming consoles and high-end graphics cards demand this level of precision repair.
Cable Strain Relief Installation: Professional repairs often include upgrading cable strain relief—reinforced areas where cables connect to ports. This prevents future damage from cable stress and movement.
The repair timeline typically ranges from same-day service for simple cleaning to 3-5 business days for port replacement, depending on parts availability and repair complexity. Professional repair costs vary ($50-150 for cleaning/realignment, $150-300 for port replacement) but remain far cheaper than device replacement.
Preventative Maintenance Tips
The best repair is one you never need. These proven maintenance strategies extend HDMI cable and port lifespan significantly:
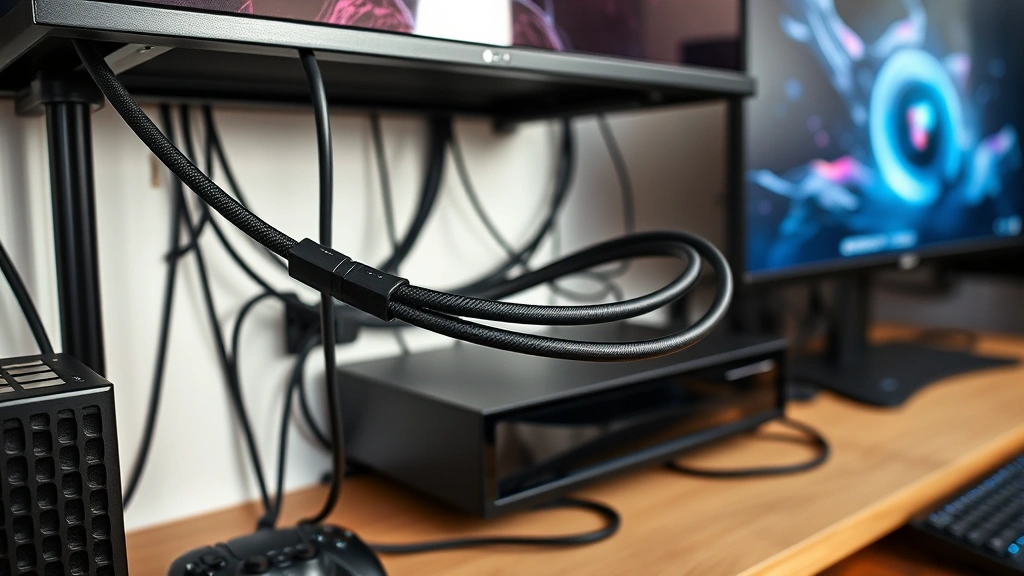
- Use cable management: Route cables away from foot traffic areas and secure them with clips or sleeves. Prevents accidental yanking and stress.
- Avoid extreme bending: Keep cables in gentle curves. Never fold them sharply or coil them tightly, as this stresses internal conductors.
- Disconnect carefully: Always pull straight out, never at angles. Use both hands if necessary—one to stabilize the device, one to gently remove the cable.
- Keep connectors clean: Periodically inspect connector ends and wipe away dust with a soft cloth. Prevents corrosion accumulation.
- Maintain proper ventilation: Ensure gaming devices have adequate airflow. Heat accelerates connector degradation and corrosion.
- Use quality cables from the start: Investing $20-30 in a certified cable prevents $100+ repair costs later.
- Avoid daisy-chaining connections: Each adapter or extension cable adds potential failure points. Keep connections direct when possible.
- Store cables properly: When not in use, store cables loosely in cool, dry environments. Extreme heat and humidity cause corrosion.
These simple habits protect your gaming investment and ensure consistent, reliable video and audio quality. They’re especially important if you maintain an expensive gaming setup—check our gaming PC build guide for additional hardware protection strategies.
When to Seek Professional Help
While many HDMI issues are cable-related and easily DIY-fixable, certain situations demand professional expertise. Knowing when to call in specialists saves time, money, and frustration.
Seek professional help when:
- Port connectors are visibly damaged: Bent pins, broken plastic housing, or loose internal components require precision soldering.
- Multiple cables fail in succession: This suggests port damage causing premature cable failure, not cable defects.
- The cable works intermittently with wiggling: Indicates internal port damage, not cable issues.
- Your device is under warranty: Professional repair preserves warranty coverage better than DIY attempts.
- You lack confidence in technical work: Professional repair eliminates risk of additional damage from mistakes.
- Your gaming device is expensive: High-end gaming PCs, consoles, and displays justify professional repair costs.
- You’ve tried cable replacement without success: The problem is definitely port-related at this point.
Professional repair technicians at places like TTOPZ have access to diagnostic equipment, replacement parts, and expertise that DIY enthusiasts lack. They can identify issues that aren’t immediately obvious and provide solutions that restore devices to manufacturer specifications.
For gamers serious about their setups, establishing a relationship with a trusted repair shop makes sense. They become familiar with your equipment and can provide faster service when issues arise. Many shops also offer preventative maintenance packages that include cable inspection and port cleaning.
FAQ
Can I use any HDMI cable for gaming?
While technically any HDMI cable transmits signal, gaming-specific requirements matter. For 4K gaming at 60Hz, HDMI 2.0 cables are necessary. For high-refresh-rate PC gaming (120Hz+), HDMI 2.1 cables provide better performance. Budget cables may work initially but degrade faster. Certified cables ensure compatibility and longevity.
How long should HDMI cables last?
Quality certified HDMI cables typically last 3-5 years with proper care. Some last longer, while poorly made cables fail within months. Lifespan depends on usage frequency, environmental conditions, and how carefully you handle connections. Professional-grade cables can last 7+ years.
What’s the difference between HDMI 2.0 and HDMI 2.1?
HDMI 2.0 supports 4K at 60Hz, adequate for console gaming and most streaming. HDMI 2.1 supports 8K and high refresh rates (up to 120Hz), essential for competitive PC gaming. For most gamers, HDMI 2.0 suffices. Only upgrade to 2.1 if your display and graphics card support higher capabilities.
Is it worth repairing an old gaming device with HDMI port damage?
Generally yes, if the device is still functional otherwise. Port repair ($150-300) costs significantly less than replacing expensive gaming equipment ($300-500+). However, if multiple components are failing, replacement might make economic sense. Consult professional technicians for specific device assessments.
Can I prevent HDMI port damage?
Absolutely. Proper cable handling, secure connections, adequate ventilation, and avoiding stress on ports prevent most damage. Using quality cables, keeping ports clean, and disconnecting carefully are your best defenses. Check out our best single player games guide and enjoy uninterrupted gaming with a well-maintained setup.
Should I replace my HDMI cable preventatively?
Only if you notice warning signs. Replacing functional cables wastes money. However, if a cable is 4+ years old and showing minor issues, replacement makes sense before complete failure occurs. This is especially true for expensive gaming setups where downtime costs productivity or entertainment value.
What should I do if my HDMI port is loose?
A loose port indicates internal damage or wear. Stop using that port immediately—continued use worsens damage. Try a different port if your device has multiple HDMI inputs. If all ports are affected or your device has only one port, seek professional repair immediately.
Can moisture damage HDMI cables and ports?
Yes, moisture causes corrosion and electrical shorts. Gaming setups in humid environments degrade faster. Use dehumidifiers if necessary, keep cables away from water sources, and store equipment in dry spaces. If moisture exposure occurs, allow thorough drying before reconnecting power.
For more gaming hardware insights and setup recommendations, visit the GameForge Daily Blog for regular updates on gaming technology and repair guidance.

